
 | Sales Orders / Billing |
When booking out a skip, you can record the following:
- Customer Details
- Delivery Address (if different)
- Skip Details
- Delivery & Collection Date & Times
- Waste Type Details
- Payment Details
Customer Details
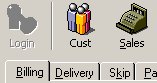
Click the Sales Orders button at the top to view the main booking screen. If the customer is a new customer you can still enter their details straight into the system - there is no need to create a customer record for them first. Enter their contact details, including Company Name, if any, Post Code, Address and Telephone Numbers.
You can enter as much or as little information as you like. But remember, the more you enter, the easier it will be to find the booking in the future. All field names in blue indicate fields that you can use to find existing customers and their previous bookings.
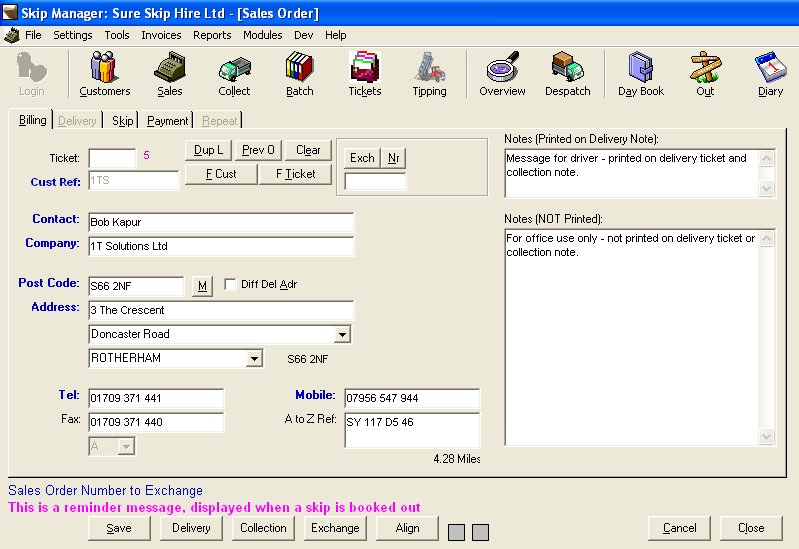
If you wish, you can enter two type of notes - ones for office use and the other for the driver which are printed on the delivery ticket.
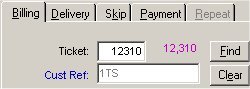
If the customer is a trade / account customer, then enter their account reference in the Cust Ref field. You can also enter part of the reference and click on the Find button to locate the customer.
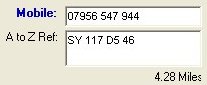
When you enter the customer's post code, the system locates the address within the built-in database to pin point the location in the map book. The map reference, together with how far the address is from the yard is shown in the map ref box, A to Z Ref, just below the Mobile number field (read more).
 If the skip is to be delivered to a different address, then tick the box, Diff Del Adr to enable the delivery address tab, Delivery.

Delivery Details
Enter relevant delivery address details. If an existing customer has had many different delivery addresses, then you can click on the Previous button to choose from the list.
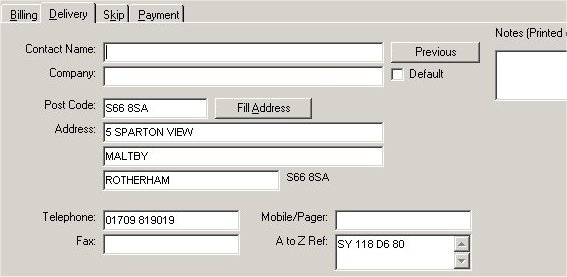
If the majority of the deliveries are to a specific address, then enter or select this address and tick the Default box.
Skip Details
Click on the Skip tab, at the top to display the skip details entry screen. Number of skips in the yard, and hired out are automatically displayed on the right hand side of the screen, below the notes.
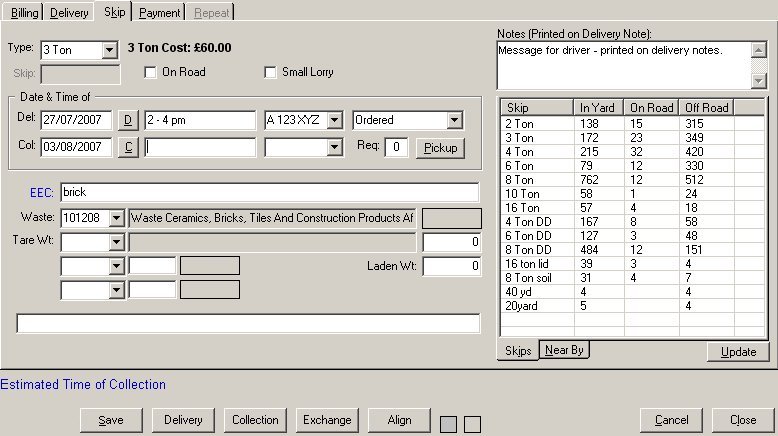
As you select the skip type (size), the system automatically displays the hire price to its right.
- The skip serial number field, Skip is disabled because the option, Use Skip SrNo in configuration is not selected.
- If the skip is to be parked on the road, then tick the box, On Road. If there is an associated permit charge for this (see configuration, On Rd Chrg), then this is added to the price and the total shown inside the square brackets:
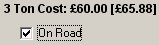
Also the Permit field will become enabled to allow you to enter the permit number assigned to this skip (if required). - If drop off site is accessible with a small lorry only, then tick the Small Lorry box; this information is printed on the delivery note so that the despatch manager and the driver are both aware.
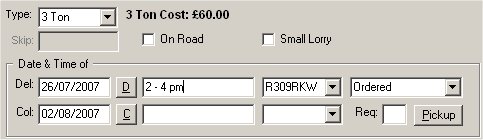
- The delivery date is automatically set to today's date. If you need to change this you can simply type the date or use the programable keys F5 - F8 to enter set dates (see configuration, Date HotKeys) or click on the D button to display the date picker calander.
- If you or the customer has specified any drop-off time, then enter it in the next field.
- You can define which driver / lorry is to drop the selected skip.
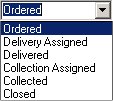
- The status of the order is automatically set to 'Ordered'. Simply click on the down arrow to change the status.
- If you have defined a Normal Hire Period in system configuration, then the collection date will be set automatically to the relevant number of days hence.
- As with the delivery details, you can also define pick-up time and lorry / driver for skip's collection.
- When the customer phones to request to have the skip to be collected, you can click on the Pickup button. Each time this is clicked, the system will increment the collection request count, to its left which you can also change yourself.
Waste Type
Below the Date and Time entry section, we have a area where you can determine what waste was collected in the skip. You can enter the following details and teh system will calculate the weight on fly as you enter the details.

- Search (highlighted by red box in image above). Here you can enter a search term relating to the waste that is contained within the skip, pressing
will then show you a list codes that the search terms appears in, allowing you the opportunity to select the desired code from a list. For each skip you can enter upto 3 codes to cover the waste collected. If all of the Waste Types fields are empty, then the selected code from the first search would be placed in the first field, second search result would appear in the next empty Waste Type field and so forth. If you know the codes of the waste already, you can of course enter these direct into the Waste Type fields.

- Laiden Weight This is the total weight including the vehicle, skip and the skip contents. This has to be entered manually.
- Tare Weight This is the weight of the vehicle and the emtpy skip. Once this two entries are entered, you will a value in Total Weight, this value would be total weight of the waste collected. This value will also appear in the field below the Tare Weight.
- Main Waste Type. This field allows you to enter the EEC code of the waste type that covers the majority of the waste collected. For example, if the waste was mainly bricks, then you could set this to 101208. If you don't know thw EEC code, you can perform a search as described above.
- Second Waste Type. This field allows you to enter a secondary EEC code to cover any other types of waste. In the field located to the right of this field, you enter the percentage make up of this Waste Type
- Third Waste Type. This field allows you to enter a third EEC code to cover any waste that's not covered by the other 2 codes. Again, in the field to the right you enter the percentage make up for this Waste Type.
Tip
You can click on the Near By tab, just below the list of Skips in the yard to show a list of skips that have already been delivered in the neighbourhood. Using this feature, you can locate skips that may be ready and can be collected on the return journey. As you click on an entry, full details are displayed at the bottom of the screen.
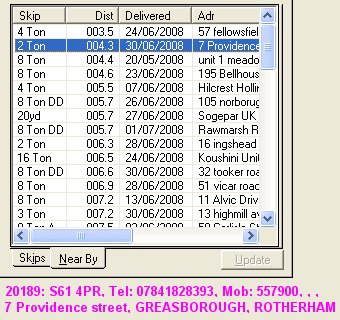
Once you have confirmed with the customer that the skip is infact ready for collection, you can enter this ticket number in the exchange field on the main billing tab. Alternatively, click on the Nr button to enter the ticket number of the selected near by skip (last one clicked in the near by list) in to the exchange field automatically.

Because this skip is likely to be hired out to another customer, you will get a warning from the system, "Exchange Delivery Address Different" - this is normal.
Payments
For existing customers, the system displays account type, credit limit and outstanding balance. You can enter method of payment and select additional items to be added to the order. For example, if you charge for say tyres then you can add this to the list. In addition to the selected skip, you can add another 3 items from a list of pre-defined products.
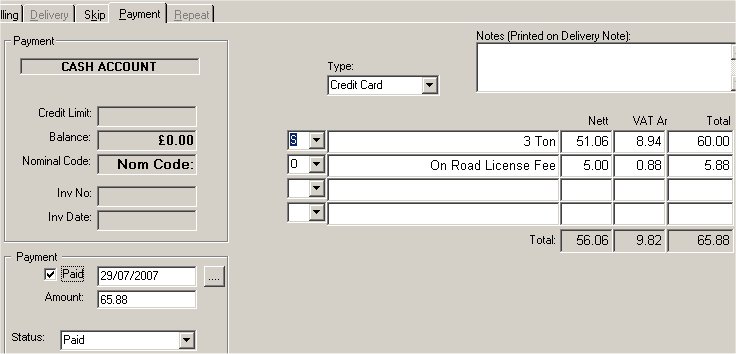
If the skip is paid for, then tick the Paid check box. The system will automatically enter payment date as today's and the total bill amount as the amount paid.
Order Status
The order status is displayed visually by two coloured squares, at the botton of the screen: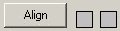 The 1st square shows the delivery / collection status whilst the 2nd, payment details.
| Display | Order | Payment |
|---|---|---|
 |
Ordered | Not Paid |
 |
Ordered | Part Paid |
 |
Ordered | Paid |
 |
Ordered | Paid with Part Written Off |  |
Ordered | Written Off |
 |
Delivery Assigned | Not Paid |
 |
Delivered | Not Paid |
 |
Collection Assigned | Not Paid |
 |
Collected | Not Paid |
 |
Closed | Not Paid |
[so_buttons]
 |